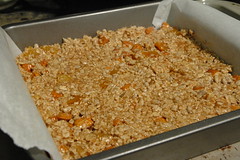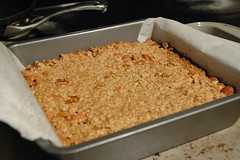
I know that she would love sweets, but first of all, I don't think sending a cake through the mail is really ideal, and second, I didn't want her to call me evil again! (Joke. I'm really not evil. So maybe I just aid and abet others in eating way too many sweets by baking too much.) This girl has been horseback riding ever since she was little and now that she's home, she gets to spend a lot of time with her horses. She needs something to keep her energy up. Granola bars are the perfect grab-and-go snacks, so I sent her some homemade bars along with a cute card. I sent them on Tuesday and they got there July 1! What with July 4 tomorrow, I didn't want anything to happen so that she received them late. Better early than late.


There are so many granola bar recipes to choose from. They all sound really good! And really, it's a matter of your own tastes and you never end up making the same bars twice. Smitten Kitchen has never let me down, so I stuck with her recipe. While this is a really good granola bar, it's not the kind I like. I like the crispy and crunchy ones that require me to chew so much that I can feel it in my jaw afterwards. But the balance of flavors in these bars is delicious. I used the least amount of sugar required and it was the perfect level of sweetness. If you don't like chewing until your jaw hurts, go for these. I think what gives these a kind-to-your-jaw chewiness is using quick oats and oat flour.

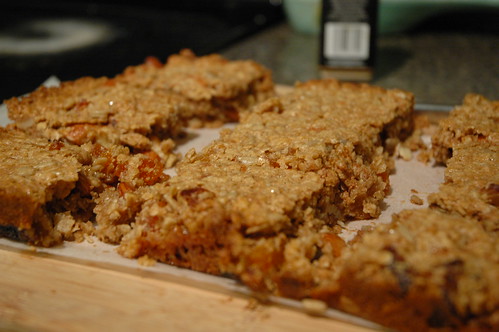
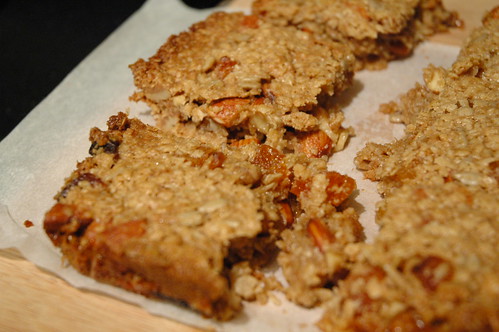
Impatience always gets the best of me. I should have waited a bit longer to cut into these, but I didn't and they ended up crumbling a bit. I was at least still able to wrap each bar individually. I got 9 bars out of this recipe. Twelve seemed a little too small and 8 seemed like too much, so 9 was just right!

Thick Chewy Granola Bars
From Smitten Kitchen
- 1 2/3 cups quick rolled oats
- 1/2 to 3/4 cup granulated sugar (more for a sweetness akin to most purchased bars; less for a mildly sweet bar)
- 1/3 cup oat flour (or 1/3 cup oats, finely ground in a food processor or blender)
- 1/2 tsp salt
- 1/4 tsp ground cinnamon
- 2 to 3 cups dried fruits and nuts (total of 10 to 15 ounces)
- 1/3 cup peanut butter or another nut butter (I used almond butter) (optional)
- 1 tsp vanilla extract (optional)
- 6 tbsp melted butter
- 1/4 cup honey, maple syrup or corn syrup [I used maple syrup]
- 2 tbsp light corn syrup (see Note above)
- 1 tbsp water
1. Line an 8x8 pan in one direction with parchment paper, allowing it to go up the opposing sides to create "handles." Lightly grease the parchment paper and the exposed pan, or coat with a non-stick spray.
2. Stir together quick oats, sugar, oat flour, salt, cinnamon, and the dried fruits and nuts. In a separate bowl, whisk together the vanilla, melted butter, maple syrup, corn syrup, and water. Toss the wet ingredients with the dry (and peanut butter, if you’re using it) until the mixture is evenly crumbly. Spread in the prepared pan, pressing them in firmly to ensure they are molded to the shape of the pan. (A piece of plastic wrap can help with this, as you press down on the back of it.)
3. Bake the bars at 350F for 30 to 40 minutes, until they’re brown around the edges — don’t be afraid to get a little color on the tops too. They’ll still seem soft and almost underbaked when you press into the center of the pan but do not worry, they’ll set completely once completely cool.
4. Cool the bars in their pan completely on a cooling rack. (Alternately, after about 20 minutes you can use your parchment “sling” to lift and remove the bars, and place them in their paper on the rack to cool the rest of the way. This can speed the process up.)
5. Once cool, a serrated knife (or bench knife) to cut the bars into squares. [Updating to note, as many had crumbling issues:] If bars seem crumbly, chill the pan of them further in the fridge for 30 minutes which will fully set the “glue”, then cut them cold. To store, wrap the bars individually in plastic or stack them in an airtight container. In humid weather, it’s best to store bars in the refrigerator. They also freeze well.

No comments:
Post a Comment