
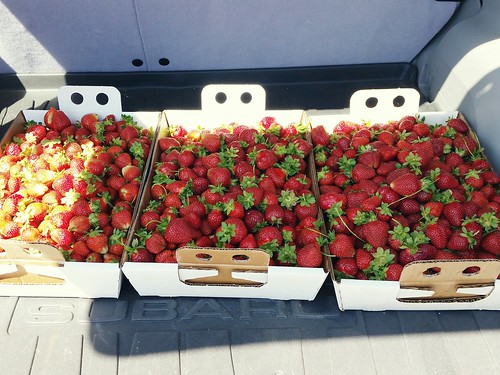
Aren't they beautiful? Last weekend, I went strawberry picking and ended up with about 15 pounds of fruit! In the moment, I wanted to pick them all. How can you spot a beautiful, bright red batch of strawberries and just walk by? I couldn't. I eventually stopped because the box was getting too heavy for me to carry back. I knew I wanted to make jam with them immediately so here I am, posting about it 3 batches of jam later.

My first 2 tries weren't successful. I'm still eating a jar from those tries though because it is still really good jam, and darn it, I made it! But it's a little runny and I wouldn't want to gift runny jam to anybody. I decided maybe I should follow the directions that are on my pectin package and that yielded the right consistency! Amazing.
This is my first canning experience ever and I am amazed that it was this successful. I can't wait to pick peaches and cherries and apples next and can those as well. I am not a fan of freezing fruit so I'm considering just canning the fruit in slices or making pie filling and canning that. If you've never canned before, the first time might be chaotic but create a system before and it'll definitely help! I hope my detailed instructions below help. Pioneer Woman gives detailed instructions with pictures for every step as well so check that out! Part 1 and Part 2.
Strawberry Jam
Before you even mess with the ingredients, I would set up a system first. It worked well for me. Here is all the equipment that I used:
Water-Bath Canner with Rack
Vinyl Coated Jar Lifter
Magnetic Lid Lifter
Extra Wide Mouth Canning Funnel
I linked Amazon on all the equipment but you can easily find them at Walmart. I also didn't buy the set but just bought the 3 pieces and that was cheaper than the set. I don't see myself using every single piece so I just saved myself a couple bucks.
Place canning rack inside canning pot and place on stove. Turn on heat to high. Place mason jars inside pot and fill with water until jars are completely submerged. I found it easier to fill the jars with water then fill the rest of the pot. I tried placing the jars into the pot full of water and the jars just fell over. Not that it really matters, but I like order. You just want to simmer the mason jars so that the hot jam does not shock the glass. I start this now because it took my pot a long while to come to a simmer and it gives you plenty of time to make the jam. I leave the lid off but if I'm almost ready and the pot is not yet simmering, lid goes on.
Next, grab the small pot and fill it with enough water to cover jar lids. The bands that screw around the top just need to be clean and not simmered. Bring to a simmer and leave alone.
Now let's make the jam.
5 cups strawberries, cleaned, rinsed, hulled, and mashed
1/4 cup fresh lemon juice (about 2 lemons)
6 tbsp pectin (I used Ball's RealFruit)
6 cups sugar (originally 7 but I cut down...and I might cut down more)
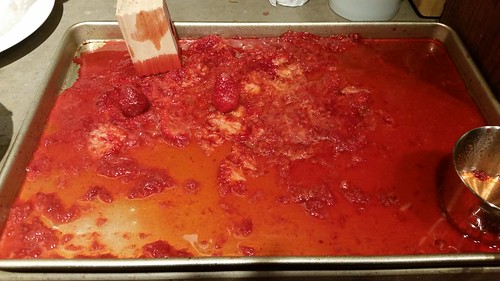
Clean the strawberries first and let it drain in a colander. Place a rimmed baking sheet on your counter. Hull the strawberries with just a spoon and place on baking sheet. Mash the strawberries with a potato masher. Measure out 5 cups and place in Dutch oven (or a big pot - the jam gets crazy and splatters everywhere so use something deep).
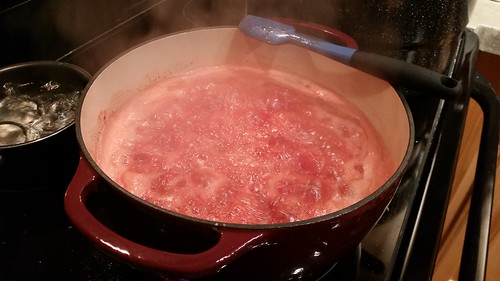
Turn on the heat on the Dutch oven. Pour in lemon juice and stir. Mix in pectin and throw in a dab of butter (this helps cut down the foam). Let it come to a "violent" boil, one that does not go away even with stirring. Mix in the sugar and let it come to a boil again. Let it boil for about a minute and turn off heat. After it has calmed down, skim off foam if there is any. Just as a warning: the jam gets everywhere when boiling. Be prepared.
Place a thick pot holder on your counter and place the Dutch oven containing your jam on it. Lay out dish towels where you want to place your jars and another near the pot as your workstation. The jam will also drip as you transfer so be prepared and lay the paper towels out now between the pot and the jar.
Hopefully, your pot with the jars has been simmering by now. Leave the heat on as you will be boiling the jars later. Take a jar out (using the jar lifter), carefully pour water out and place onto your workstation. Put in funnel, pour in jam (leaving at least 1/4 inch heads pace), take out funnel, grab a lid with magnetic lid lifter, place on jar, screw on band JUST until you meet resistance, set aside. Repeat with all your jars.
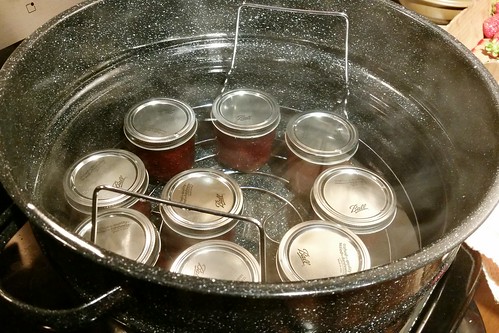
Place the filled jars back into the canning pot using the jar lifter. Turn the heat to high and cover with lid. Bring it to a violent boil and let it boil for about 10 minutes. Then turn off heat and let the jars sit in the hot water for about 5 minutes. Take out the jars one by one using the jar lifter and now listen for every single pop! Count your pops - that's the sound of it sealing! Leave the jars alone for at least 24 hours.
After 24 hours, unscrew the bands and check the lids. It should not make a popping noise when you push the center. If it does, it's still edible; you just have to put it in the fridge.
No comments:
Post a Comment