It's been 3 weeks since my school year ended and my summer started. It's been nice to relax and not have to be anywhere all day but it's a good thing I'm taking a summer grad class and that I am getting ready to move or else I think I would go crazy from boredom! I recently accepted a job offer at a new school district to be closer to my family. I am getting too old to be doing 7-hour drives any longer. My new place cuts off only 2 hours, but that is still much more manageable for me. I start getting tired at about the 4th or 5th hour, so it's actually perfect.
I don't think it has hit me just yet that I will not be returning to the same school in August. My coworkers and I have gotten really close these last 2 years and I am sad to be leaving just when I think that things are going to change for the better. It didn't even hit me when we had our annual end-of-the-year faculty luncheon. The principal did her usual goodbyes and handed out cards and I was one of them this year, but still I didn't even tear up. It'll probably hit me when we're going back to school and there are no familiar faces. It'll be a difficult transition, but the staff members I met when I went for my interview were very nice. I've heard good things about the schools so I am also looking forward to this new chapter in my life!
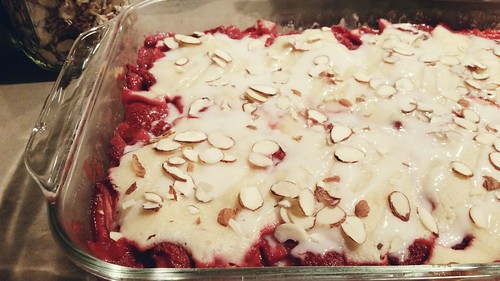
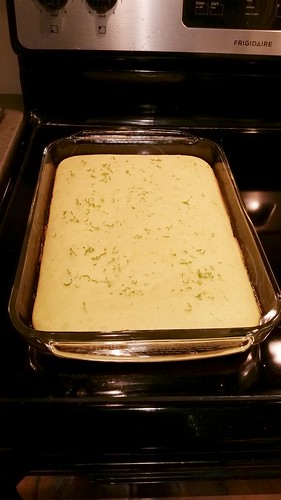
For our luncheon, we were asked to bring in a dessert and I made these Strawberry Lemon Bars. I think I had too much batter because the bars turned out a lot thicker than it looked like in the original post, but it still turned out great and it was all gone by the end! I think I made something with strawberries last year too. Probably because I had picked about 15 pounds of it last year around the same time, same as this year. Dealing with 15 pounds of strawberries every May is definitely becoming a tradition now.
Next pick-your-own fruit is peach! What should I make with peaches? Definitely canning is in the picture - jam and pie filling!
Strawberry Lemon Bars
From Mind Over Batter
For the macerated strawberries
1 1/2 to 2 pounds strawberries
4 tbsp sugar
For the bars
1 cup (2 sticks) unsalted butter, room temperature
2 cups sugar
1 tsp salt
4 eggs
1 1/2 tsp vanilla bean paste (I used extract)
2 lemons, zested and juiced
3 cups all purpose flour
For the glaze
1 cup powdered sugar
1 1/4 tsp vanilla extract
2 to 3 tbsp milk
Hull and slice the strawberries in half. Place in a large bowl and sprinkle sugar over the berries. Mix briefly with a spatula and set aside uncovered for about an hour or so. This will soften the berries and make them juicy.
Preheat the oven to 350F. Butter a 9x13 baking dish and line with parchment leaving a slight overhang (I skipped the parchment step as I would be serving right out of the dish). Set aside.
Using a hand mixer or a stand mixer on medium speed, cream the butter, sugar, lemon zest, and salt until light and fluffy, about 3 to 5 minutes. Add eggs on at a time, mixing well after each addition. Stop and scrape the mixer. Reduce speed to low and add the lemon juice and vanilla bean paste. Mix briefly to combine. Add the flour in two parts, mixing until just combined. Remove from mixer and give it another couple of folds to incorporate any dry bits on the bottom of the bowl. The batter is a bit stiff and not pourable.
Measure about 3 1/2 cups of batter and drop into prepared pan. Smooth and even out as best you can.
Take spoonfuls of macerated strawberries and drop them evenly into the pan. Drizzle 6 to 8 tablespoons of the strawberry juice. With a cookie scoop, drop remaining batter over the strawberries. No need to smooth it out - it will melt and come together in the oven.
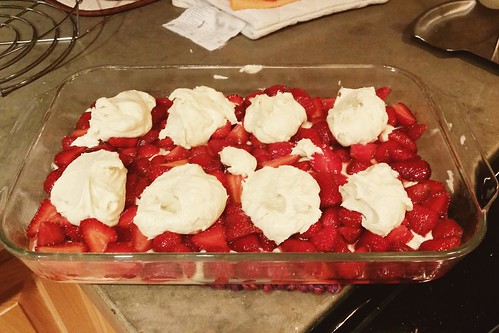
Place pan in preheated oven and bake for 30 to 35 minutes until the top is golden brown and strawberries are bubbling. Remove pan from oven and allow to cool completely before glazing.
In a small bowl, combine the powdered sugar and vanilla extract. Add milk 1 tbsp at a time and mix until you get desired consistency. Once bars are cool, cut into squares (if you desire) and drizzle glaze over the bars. Top with a strawberry half if you desire.
Wednesday, June 10, 2015
Monday, June 1, 2015
Strawberry Jam
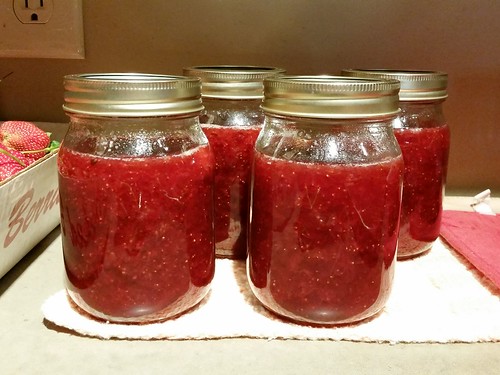
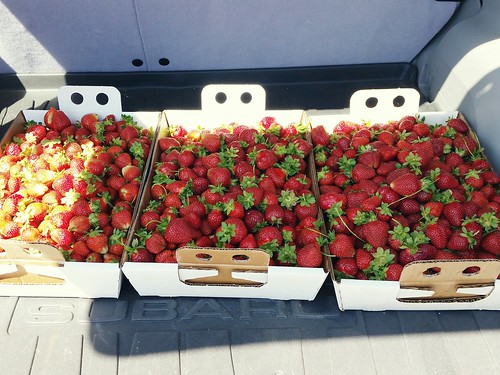
Aren't they beautiful? Last weekend, I went strawberry picking and ended up with about 15 pounds of fruit! In the moment, I wanted to pick them all. How can you spot a beautiful, bright red batch of strawberries and just walk by? I couldn't. I eventually stopped because the box was getting too heavy for me to carry back. I knew I wanted to make jam with them immediately so here I am, posting about it 3 batches of jam later.
My first 2 tries weren't successful. I'm still eating a jar from those tries though because it is still really good jam, and darn it, I made it! But it's a little runny and I wouldn't want to gift runny jam to anybody. I decided maybe I should follow the directions that are on my pectin package and that yielded the right consistency! Amazing.
This is my first canning experience ever and I am amazed that it was this successful. I can't wait to pick peaches and cherries and apples next and can those as well. I am not a fan of freezing fruit so I'm considering just canning the fruit in slices or making pie filling and canning that. If you've never canned before, the first time might be chaotic but create a system before and it'll definitely help! I hope my detailed instructions below help. Pioneer Woman gives detailed instructions with pictures for every step as well so check that out! Part 1 and Part 2.
Strawberry Jam
Before you even mess with the ingredients, I would set up a system first. It worked well for me. Here is all the equipment that I used:
Water-Bath Canner with Rack
Vinyl Coated Jar Lifter
Magnetic Lid Lifter
Extra Wide Mouth Canning Funnel
I linked Amazon on all the equipment but you can easily find them at Walmart. I also didn't buy the set but just bought the 3 pieces and that was cheaper than the set. I don't see myself using every single piece so I just saved myself a couple bucks.
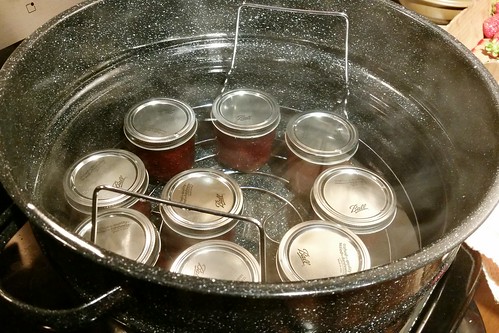
Place canning rack inside canning pot and place on stove. Turn on heat to high. Place mason jars inside pot and fill with water until jars are completely submerged. I found it easier to fill the jars with water then fill the rest of the pot. I tried placing the jars into the pot full of water and the jars just fell over. Not that it really matters, but I like order. You just want to simmer the mason jars so that the hot jam does not shock the glass. I start this now because it took my pot a long while to come to a simmer and it gives you plenty of time to make the jam. I leave the lid off but if I'm almost ready and the pot is not yet simmering, lid goes on.
Next, grab the small pot and fill it with enough water to cover jar lids. The bands that screw around the top just need to be clean and not simmered. Bring to a simmer and leave alone.
Now let's make the jam.
5 cups strawberries, cleaned, rinsed, hulled, and mashed
1/4 cup fresh lemon juice (about 2 lemons)
6 tbsp pectin (I used Ball's RealFruit)
6 cups sugar (originally 7 but I cut down...and I might cut down more)
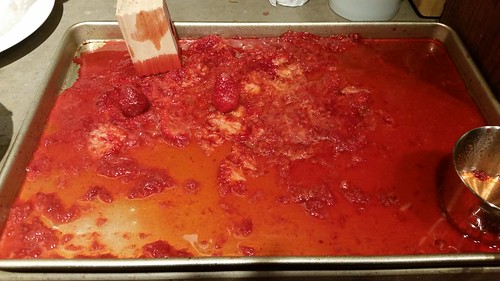
Clean the strawberries first and let it drain in a colander. Place a rimmed baking sheet on your counter. Hull the strawberries with just a spoon and place on baking sheet. Mash the strawberries with a potato masher. Measure out 5 cups and place in Dutch oven (or a big pot - the jam gets crazy and splatters everywhere so use something deep).
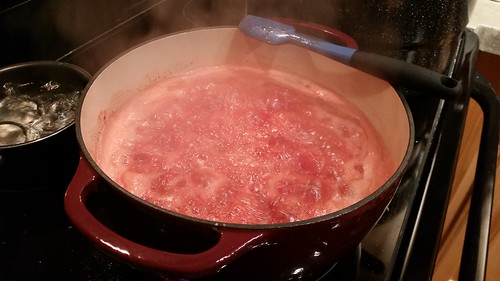
Turn on the heat on the Dutch oven. Pour in lemon juice and stir. Mix in pectin and throw in a dab of butter (this helps cut down the foam). Let it come to a "violent" boil, one that does not go away even with stirring. Mix in the sugar and let it come to a boil again. Let it boil for about a minute and turn off heat. After it has calmed down, skim off foam if there is any. Just as a warning: the jam gets everywhere when boiling. Be prepared.
Place a thick pot holder on your counter and place the Dutch oven containing your jam on it. Lay out dish towels where you want to place your jars and another near the pot as your workstation. The jam will also drip as you transfer so be prepared and lay the paper towels out now between the pot and the jar.
Hopefully, your pot with the jars has been simmering by now. Leave the heat on as you will be boiling the jars later. Take a jar out (using the jar lifter), carefully pour water out and place onto your workstation. Put in funnel, pour in jam (leaving at least 1/4 inch heads pace), take out funnel, grab a lid with magnetic lid lifter, place on jar, screw on band JUST until you meet resistance, set aside. Repeat with all your jars.
Place the filled jars back into the canning pot using the jar lifter. Turn the heat to high and cover with lid. Bring it to a violent boil and let it boil for about 10 minutes. Then turn off heat and let the jars sit in the hot water for about 5 minutes. Take out the jars one by one using the jar lifter and now listen for every single pop! Count your pops - that's the sound of it sealing! Leave the jars alone for at least 24 hours.
After 24 hours, unscrew the bands and check the lids. It should not make a popping noise when you push the center. If it does, it's still edible; you just have to put it in the fridge.
Friday, April 10, 2015
Margarita Cake Balls
I should have known I would get sick as soon as spring break started. This is our first break since December and, between then and now, I have been going, going, going like a hamster stuck on its wheel. The bright side is that at least it is during break and I don't have to drag myself to school while I am feeling miserable or having to sub plans (sub plans are worse than taking a day off, in my opinion). The down side is that it is spring break and I haven't been able to do much in the first part. I'm finally over the sickness but I have a weekend left to be as productive as I can.
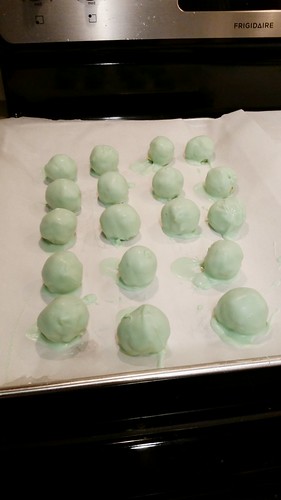
One of those productive things was to send my sister a birthday package. Today is her birthday and since I didn't drive home this time around, I wanted to surprise her with something at work. I had sent her mason jar cupcakes one birthday and I didn't want to do that again. For some reason, my brain went to something with alcohol. I think it's because I knew she was doing a happy hour celebration after work and I couldn't be there so why not send the booze her way? Well, say hello to Margarita Cake Balls - just about the perfect thing for me to make!
I don't think it really turned out all that boozy but it's still really good. I'm sending it to her work anyway so I shouldn't get her too drunk, ha! I took the easy way out and chose the recipe that used a cake mix (oops), but it was just a lot easier for lazy old me on spring break, especially on a recipe that is pretty labor intensive anyway. It took me a whole day to complete this. Of course, I took some breaks in between when things needed to be chilled and such, but with the cake baking, cooling, crumbling, chilling, frosting making, mixing, rolling, chilling, chocolate melting, dipping, chilling, chocolate melting, more dipping, a whole day was needed.
My dipping skills increased with this recipe but this is the fourth time I've made cake balls in the last 6 years so it still needs work. It's a lot of fun making these actually and very versatile as you can change the flavors of the cake and the frosting and even coat it in real chocolate instead of candy melts. Have fun with it!
Margarita Cake Balls
From Butterlust
For the cake
1 box yellow cake mix
1/3 cup vegetable oil
1/2 cup water
3 eggs
1/2 cup tequila + 2 tsp, separated
1/3 cup lime juice
1 tbsp lime zest + 1 tsp, separated
For the frosting (I needed to double the recipe)
4 oz. cream cheese, softened
2 tbsp butter, softened
1 cup powdered sugar
2 tsp lime juice
1 tbsp tequila
For decoration
2 packages white candy coating (sometimes called almond bark)
1 package green candy coating or oil-based green food coloring
Large sugar crystals
Salt
Preheat the oven to 350F and grease a 9x13 pan.
In a large bowl, combine the cake mix, eggs, oil, water 1/2 cup tequila, lime juice, and 1 tsp zest and mix on medium-high speed for 2 minutes or until batter becomes fluffy. Bake for approximately 25 minutes or until a toothpick inserted into the center of the cake comes out clean.
Let cool for at least 15 minutes, then brush the top of the cake with 2 tsp tequila & sprinkle 1 tsp zest over the top. Let cake cool completely, up to overnight.
Just before assembly, use a fork or your hands to break up the cake into fine crumbs, removing any large crusty pieces from the cake's edges.
To make the frosting, combine cream cheese and butter in the bowl of a stand mixer and beat until smooth. Add the powdered sugar in half cup increments and blend until there are no lumps. Add the lime juice and tequila and blend until combined.
To assemble, line a baking sheet with parchment paper and set aside.
Thoroughly mix 1/2 of your frosting into the crumbled cake mixture. Test your “dough” to see if it is sticky enough to form a ball without crumbling. Add more icing if needed, until consistency is almost that of a thick cookie dough (no dry cake balls!).
Place in refrigerator for at least 30 minutes (you could also do this the night before) – it will make it easier to roll into balls. Using your hands, roll chilled cake mixture into 1 inch balls. Place on lined baking sheet.
When done, place baking sheet in freezer and let cake balls chill for 30 minutes. This step is optional, but it helps the cake balls keep their shape and prevents crumbs from getting in the candy bark and thus, causing lumpy coating.
While cake balls are chilling, microwave a package of white candy bark in a small bowl, stirring every 30 seconds, until melted. If desired, add oil-based food coloring (it must be oil-based! water-based will cause your candy coating to seize up) OR before microwaving the white candy, toss in a handful of green ones in the same bowl to achieve your desired shade of margarita green. [I ended up using at least 4 packages of white candy melts to double coat all of my cake balls.]
Place a cake ball into the bowl of melted candy coating and use a spoon to cover with coating. Lift the cake ball out of the coating with a fork and tap against the rim of the bowl to remove excess. Use a toothpick to gently push the cake ball back on to a parchment or foil cookie sheet (or onto your counter, lined with parchment paper). Make sure you push the cake ball from the bottom so you don’t smudge your coating.
While the coating is still wet, give your cake ball a healthy sprinkling of decorating sugar and a tiny pinch of salt, if desired.
Sunday, April 5, 2015
Key Lime Pie
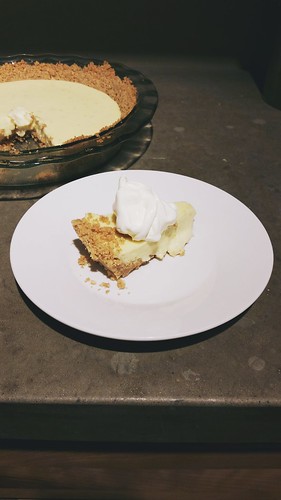
Last month, to celebrate Pi Day and St. Patrick's Day, I decided to combine the two holidays together and make a green pie. I thought of Key Lime Pie first and even though I didn't add food coloring to make the pie green, it was still good so it's okay. I had never had Key Lime Pie before but I used Smitten Kitchen's recipe and she has very reliable recipes. I'm still not sure what the difference between a regular lime and a key lime is except that key limes are more difficult to juice but are cute and small. You can use regular limes instead but since I had access to key limes and the recipe is named after those specific limes, I ditched the regular ones. I loved the graham cracker crust and I made sure to put a huge dollop of whipped cream on each slice :)
Key Lime Pie
From Smitten Kitchen
For the crust
1 1/2 cups (155 grams) finely ground graham cracker crumbs (from about 10 crackers)
3 tablespoons (40 grams) granulated sugar
2 pinches sea salt
7 tablespoons (100 grams) unsalted butter, melted
For the filling
1 1/2 tablespoons finely grated lime zest
3 large egg yolks (though extra-large would do you no harm here)
1 14-ounce (396-gram) can sweetened condensed milk
2/3 cup (155 ml) fresh lime juice (from about 1 dozen tiny key limes or 4 persian/regular limes)
For the topping
3/4 cup (175 ml) heavy whipping cream
1 to 2 tablespoons powdered or granulated sugar, to taste
Preheat oven to 350°F (176°C).
Combine graham crumbs, sugar and salt in a medium bowl and stir until mixed. Add butter and stir until crumbs are evenly coated. Press crumbs into the bottom and up the sides of a standard 9-inch pie dish. I like to use the outer edge of a heavy measuring cup to press in neat, firm sides but nobody will be the wiser if you just use your fingertips. Bake crust until lightly browned, about 10 minutes. Set on cooling rack while you prepare filling. Leave oven on.
Zest limes into the bottom of a medium bowl until you have 1 1/2 tablespoons. Beat zest and egg yolks with an electric mixer until pale and thick, about 5 minutes. Add sweetened condensed milk and beat until thickened again, about 3 minutes more. Squeeze zested limes until you have 2/3 cups juice. Whisk into yolk mixture until combined.
Pour into graham crust and bake pie for another 10 minutes, until set but not browned on top at all. Let pie cool completely before adding topping.
In a medium bowl, beat cream and sugar until soft peaks are formed. Spread over top of chilled pie. Ideally, pie should be chilled at least another 2 to 3 hours with the cream on top so that it can fully set before you take a slice, but whether that happens is between you and your pie. Key lime pie keeps in fridge for a week.
Tuesday, February 24, 2015
Homemade Lemonade
I've been ready for spring the first time it hit -32819302 degrees over here. The cold temperatures was too much even for my little car battery! It's okay now but that was the first time I've had that happen to me and it was a little stressful. Nothing like a sudden car service to break the bank. Even though it's cold outside, I'm drinking homemade ice cold lemonade. It's putting me in spring mode because I am so ready for it!
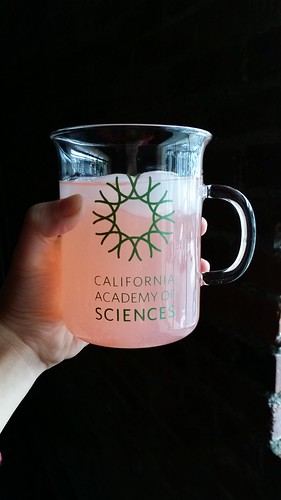
I even was a little adventurous and made myself pink lemonade! I googled the other day how it was even made and apparently it's either cranberry juice or food coloring. I'm not a fan of cranberry juice and I have an excess supply of food coloring for some reason so I just squeezed a tiny bit in my glass and mixed it around. It really looks like store bought and tastes better!
Hey over-21's, try putting gin in your lemonade with some mint leaves. So good.
Homemade Lemonade
From Real Simple
1/2 cup sugar
Water
1 cup fresh lemon juice (from about 5 lemons)
In a small saucepan, combine the sugar and 1/2 cup water. Bring to a boil, stirring occasionally, until the sugar is dissolved. Let cool.
In a pitcher, combine the syrup with the lemon juice and 2 1/2 to 3 cups water. Serve over ice.
Subscribe to:
Posts (Atom)