Showing posts with label pie. Show all posts

Sunday, April 5, 2015

Key Lime Pie

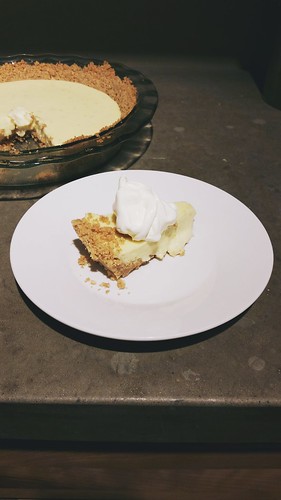
Last month, to celebrate Pi Day and St. Patrick's Day, I decided to combine the two holidays together and make a green pie. I thought of Key Lime Pie first and even though I didn't add food coloring to make the pie green, it was still good so it's okay. I had never had Key Lime Pie before but I used Smitten Kitchen's recipe and she has very reliable recipes. I'm still not sure what the difference between a regular lime and a key lime is except that key limes are more difficult to juice but are cute and small. You can use regular limes instead but since I had access to key limes and the recipe is named after those specific limes, I ditched the regular ones. I loved the graham cracker crust and I made sure to put a huge dollop of whipped cream on each slice :)

Key Lime Pie

Key Lime Pie
From Smitten Kitchen

For the crust
1 1/2 cups (155 grams) finely ground graham cracker crumbs (from about 10 crackers)
3 tablespoons (40 grams) granulated sugar
2 pinches sea salt
7 tablespoons (100 grams) unsalted butter, melted

For the filling
1 1/2 tablespoons finely grated lime zest
3 large egg yolks (though extra-large would do you no harm here)
1 14-ounce (396-gram) can sweetened condensed milk
2/3 cup (155 ml) fresh lime juice (from about 1 dozen tiny key limes or 4 persian/regular limes)

For the topping
3/4 cup (175 ml) heavy whipping cream
1 to 2 tablespoons powdered or granulated sugar, to taste

Preheat oven to 350°F (176°C).

Combine graham crumbs, sugar and salt in a medium bowl and stir until mixed. Add butter and stir until crumbs are evenly coated. Press crumbs into the bottom and up the sides of a standard 9-inch pie dish. I like to use the outer edge of a heavy measuring cup to press in neat, firm sides but nobody will be the wiser if you just use your fingertips. Bake crust until lightly browned, about 10 minutes. Set on cooling rack while you prepare filling. Leave oven on.

Zest limes into the bottom of a medium bowl until you have 1 1/2 tablespoons. Beat zest and egg yolks with an electric mixer until pale and thick, about 5 minutes. Add sweetened condensed milk and beat until thickened again, about 3 minutes more. Squeeze zested limes until you have 2/3 cups juice. Whisk into yolk mixture until combined.

Pour into graham crust and bake pie for another 10 minutes, until set but not browned on top at all. Let pie cool completely before adding topping.

In a medium bowl, beat cream and sugar until soft peaks are formed. Spread over top of chilled pie. Ideally, pie should be chilled at least another 2 to 3 hours with the cream on top so that it can fully set before you take a slice, but whether that happens is between you and your pie. Key lime pie keeps in fridge for a week.

Saturday, December 13, 2014

Apple Pie

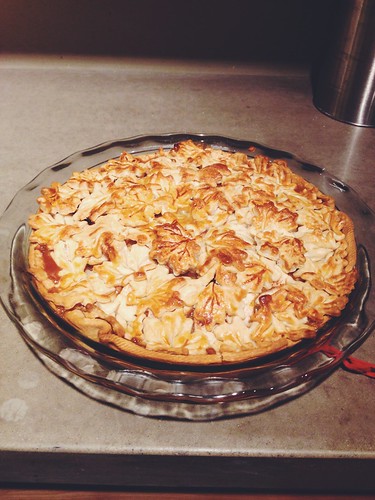
Last month, I went apple picking at a local family farm called Chiles Peach Orchard. I love this place because the prices aren't bad, the fruits are plentiful and delicious, the people are friendly, and I get to eat at Blue Mountain Brewery for lunch every time I go fruit picking. I have picked their cherries, strawberries, and peaches as well and they have all been worth the trip so when I saw that they had Fuji apples available, I wanted to go again before the place closed for the season. It was in the 40s temperature-wise but I had my gloves on so I managed to get myself at least 30 pounds of apples! What do you do with all that?! Make pies, of course.

Apple Pie

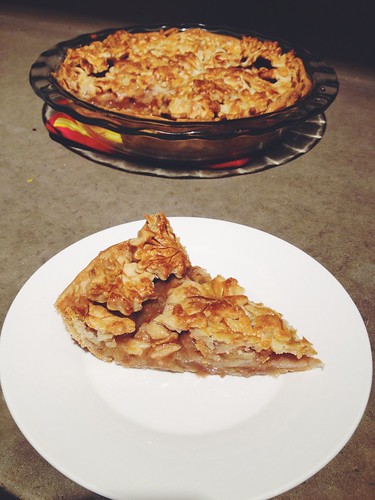
I used Smitten Kitchen's recipe and had to adapt the spices because I am not a fan of allspice and it was a little overpowering. Smitten Kitchen suggested doubling the spices, but I was actually okay with the original amount. I liked letting the flavors of the apple come through instead with just a hint of the spices. I didn't use the crust recipe that she provided in the same post and I decided to change it up in terms of the design as well! I bought a leaf cookie cutter on Amazon, stamped out leaf-shaped pieces from the pie crust, and layered them on top of the pie. It actually turned out better than I thought and people were impressed! I saw the idea on Pinterest while just browsing around and I'm glad I decided to give it a try.

In addition to making four pies (only one was for myself!), I also snacked on the apples every day and shared some with coworkers and friends. But guess what...I still have lots of apples left! They are surprisingly staying in good shape in the fridge so I am still snacking and adding them in my oatmeal in the mornings sometimes. I just got a box of oranges from my school's FFA as well so I think I'm good on fruits for a while!

Apple Pie

Drop a scoop of ice cream on this slice of warm apple pie. Mm mm good.

Apple Pie
Adapted slightly from Smitten Kitchen

4 pounds Granny Smith apples (about 7 or 8 medium apples)
1 tbsp juice and 1 tsp zest from 1 lemon
3/4 cup (5.25 oz) plus 1 tbsp sugar
2 tbsp all-purpose flour
1/4 tsp salt
1 tsp cinnamon
1/4 tsp ground nutmeg
1/8 tsp ground allspice
1 egg white, beaten lightly

Adjust oven rack to lowest position and heat rimmed baking sheet and oven to 425°F. Remove one piece of dough from refrigerator (if refrigerated longer than 1 hour, let stand at room temperature until malleable).

Roll dough on lightly floured work surface or between two large sheets of plastic wrap to 12-inch disk. Transfer dough to pie plate by rolling dough around rolling pin and unrolling over 9 1/2-inch pie plate or by folding dough in quarters, then placing dough point in center of pie plate and unfolding. Working around circumference of pie plate, ease dough into pan corners by gently lifting dough edges with one hand while pressing around pan bottom with other hand. Leave dough that overhangs lip of plate in place; refrigerate dough-lined pie plate.

Peel, core and cut apples in half, and in half again width-wise; cut quarters into 1/4-inch slices and toss with lemon juice and zest. In a medium bowl, mix 3/4 cup sugar, flour, salt and spices. Toss dry ingredients with apples. Turn fruit mixture, including juices, into chilled pie shell and mound slightly in center.

Roll out second piece of dough to 12-inch disk and place over filling. Trim top and bottom edges to 1/2-inch beyond pan lip. Tuck this rim of dough underneath itself so that folded edge is flush with pan lip. Flute edging or press with fork tines to seal. Cut four slits on dough top. If pie dough is very soft, place in freezer for 10 minutes. Brush egg white onto top of crust and sprinkle evenly with remaining 1 tablespoon sugar.

Place pie on baking sheet and bake until top crust is golden, about 25 minutes. Rotate pie and reduce oven temperature to 375°F; continue baking until juices bubble and crust is deep golden brown, 30-35 minutes longer.

Transfer pie to wire rack; cool to room temperature, at least 4 hours.

Sunday, November 9, 2014

Peach Pie

I just had pie for breakfast. Don't judge me.
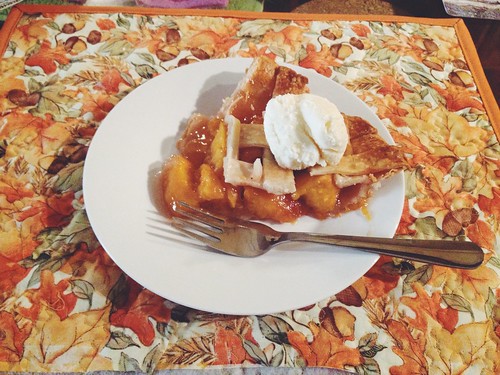
Peach Pie

I bought a box of peaches a couple months ago and a lot of them ripened faster than I could eat them so I sliced them up and froze them. Then when I got my ice cream maker and started making ice cream every other day, my freezer soon ran out of space and I've been working on getting rid of a lot of stuff. The peaches took up quite some space so I decided to make pie to get rid of them. It was a very good decision and it made me realize I really need to make more peach pies. It was my first time making a lattice design as well but I think it turned out pretty well.
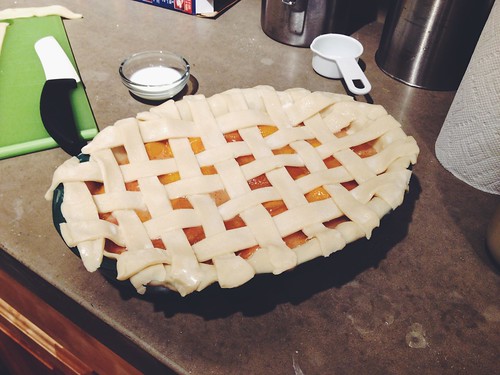
Peach Pie

Smitten Kitchen suggests using 1/3 cup of both sugars for a sweeter pie but I think 1/4 cup was sweet enough. My peaches were ripe and super sweet to begin with so I might even lower it the next time, but not by much. I had to bake it in a casserole dish because surprisingly, I don't have a pie dish. I used to but I left it at school after a luncheon and forgot to get it back and have no idea where it could have gone now. The filling was the perfect amount though and the casserole dish worked just as well. You could probably even bake it in a square dish and it wouldn't matter! It might even be nice to change up the design once in a while. Just don't change the recipe. This is perfect the way it is. The ingredient list is simple and short and the recipe really features only the flavor of the peaches with a little cinnamon and nutmeg. Serve this pie at Thanksgiving dinner (or any dinner, really...) with a side of ice cream as something refreshing aside from the heavy pumpkin and sweet potato pies.
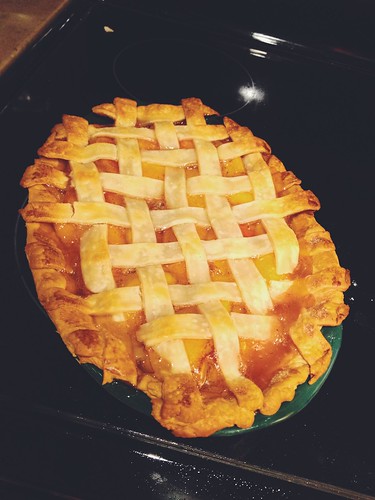
Peach Pie

Peach Pie
Adapted from Smitten Kitchen

2 Pillsbury's ready-made pie crusts

For the filling
About 3 1/2 pounds peaches (approximately 6 large, 7 medium or 8 small)
1 tbsp fresh lemon juice, from about half a regular lemon
1/4 cup granulated sugar (see note up top; use 1/3 cup for a sweeter pie)
1/4 cup light brown sugar (ditto)
1/8  tsp ground cinnamon
Few gratings of fresh nutmeg
1/8 tsp table salt
3 tbsp cornstarch

For the finish
1 tbsp milk, cream or water
1 tbsp coarse or granulated sugar

The peaches need to be peeled before slicing. I used a vegetable peeler to peel them easily or you can boil the peaches also to peel the skins easily. To boil the peaches, bring a large saucepan of water to boil. Prepare an ice bath. Make a small x at the bottom of each peach. Once water is boiling, lower peaches, as many as you can fit at once, into saucepan and poach for two minutes. Using a slotted spoon, transfer to ice bath for one minute to cool. Transfer peaches to cutting board and peel the skins. In most cases, the boiling-then-cold water will loosen the skins and they’ll slip right off. In the case of some stubborn peaches, they will stay intact and you can peel them with a paring knife or vegetable peeler and curse the person who made you waste your time with poaching fruit. Halve and pit the peaches, then into about 1/3-inch thick slices. You’ll want 6 cups; it’s okay if you go a little over.

Add the peaches to a large bowl and toss with lemon juice. In a small dish, stir together sugars, cinnamon, nutmeg, salt and cornstarch until evenly mixed. Add to peaches and toss to evenly coat.

Preheat oven to 425F.

Transfer pie dough to a standard pie dish by folding it gently into quarters (making no creases), arranging the folded corner into one quadrant of the bottom of your tin and gently unfolding it to fit over the base. Trim the overhang to one inch. Scoop filling into bottom pie dough, including any accumulated juices (they contain the thickener too, also: tastiness).

If you’d like to make a regular lidded pie, use the top pie dough as is, cutting some decorative vents in the pie lid before baking. To make a lattice-top pie, cut the pie dough into strips anywhere from 1/2 to 1-inch wide with a pastry wheel, pizza wheel or knife. Arrange every other strip across your pie filling in one direction, spacing the strips evenly. Fold back every other strip gently on itself and add the longest remaining strip in the other direction. Fold the strips back down, repeat with the other strips until a full lattice-top is formed. Trim the lattice’s overhang to the diameter of the pie dish’s rim (i.e. no overhang; only the bottom crust will have that and this is a case of do as I say, not as I do, because I totally forgot this detail when I was making the above pie). Gently fold the rim of the bottom crust over the lattice strips and crimp decoratively.

Once assembled, brush pie with milk, cream or water and sprinkle with sugar.

Bake the pie for about 20 minutes in the preheated oven, until the crust is set and beginning to brown. Reduce oven temperature to 375 and bake pie for another 30 to 40 minutes, until filling is bubbling all over and the crust is a nice golden brown. If the pie lid browns too quickly at any point in the baking process, you can cover it with foil for the remaining baking time to prevent further browning.

Let the pie cool for at least three hours at room temperature before serving, otherwise the filling will be runny. Pie can be stored at room temperature or in the fridge; from the fridge, it will be even thicker.

Tuesday, November 27, 2012

Mini Persimmon Tarts

How did everyone enjoy the Thanksgiving holiday? I hope you all got time with your family, got to eat wonderful food, and got to go shopping for some good sales! My Thanksgiving break was too short. It probably felt that way mostly because I spent a lot of it sick. Of course I would get sick the Friday break starts!

Mini Persimmon Tarts

Last year, I was grateful to be invited to my carpool buddy's Thanksgiving with her family. This year, her family traveled, but I stayed in Roanoke again and my family decided to drive down from New Jersey to spend Thanksgiving here. It was a short stay. They got here Wednesday night at 1:30 a.m. and left at 5:30 p.m. after we had our Thanksgiving "linner." It was still good to see everyone, especially the two dogs! The Chihuahua almost had a heart attack when he saw me, which he always does, while the older one simply sniffed me and walked away. I still love him. (Maybe.)

Since we're a small family and we didn't want to overindulge or deal with a bunch of leftovers, I only served a few things: roasted pork loin, stuffing, rolls, and mini persimmon tarts for dessert. I knew my dad would be driving right after we ate so I decided not to do turkey. Turkey makes you sleepy! I found a great pork recipe with apples and onions and it turned out great. I should post the recipe with pictures sometime soon, but the only pictures I got were the tarts.

Mini Persimmon Tarts

When I made pumpkin pie for dessert two Thanksgivings ago, I found out that my mom doesn't like pumpkin pie. She didn't enjoy dessert that year. My whole family loves persimmons though so I wanted to bake with them. I settled on mini tarts as they would be small servings for our already-stuffed stomachs. My sister suggested serving it with ice cream, somewhat like apple pie, and I went for it. Why not?

I'm not really sure how I feel about the persimmon tart as a whole. I think I just prefer raw persimmons over cooked ones. In my opinion, the best part of this tart was the crust. A really easy crust to put together that yields an amazing flakiness. I'll probably be using this recipe for any tarts I make in the future. The instructions for this persimmon tart weren't very specific when it came to the persimmons. I would guess that 4 would be enough for one whole tart. As for the spices, take your best guess, but you can never go wrong with cinnamon and sugar!

Mini Persimmon Tarts

Persimmon Tart
From I Heart Baking

2 1/2 cups flour
1 tsp salt
1 tsp sugar
2 sticks butter, cold
3/4 cup ice water
4 persimmons
Sugar
Flour
Cinnamon
Salt
Cloves

In a bowl, mix flour, sugar, and salt. Using a pastry blender or your hands, cut in the cold butter until the mixture is coarse. Pour in ice water and mix to bring the dough together. Add more if necessary. Take out of bowl and put on a lightly floured surface. Roll out the dough and fit into a 9-inch tart pan. Chill in the fridge.

Wash, peel, and slice the persimmons. Toss with sugar, flour, cinnamon, salt, and a pinch of cloves.

Pull the chilled tart crust out of the fridge. Arrange the persimmon slices in any pattern you desire. If desired, brush the edge of the crust with egg wash and sprinkle with sugar.

Bake at 375F for 45 minutes.

Friday, July 27, 2012

Lemon Butter Crust

While hanging out with a couple friends last week, we had a sudden urge to make pies. It was probably because we were just really hungry, but we ended up at Walmart to buy ingredients to make 3 different kinds: Frito Pie, Apple Pie, and Blueberry Pie. I was in charge of the fruit pies. There was a pre-made pie crust in the freezer that I could have used, but I really wanted to make the crust from scratch. I've baked a lot of pies but always with Pillsbury's crusts and this was a good time to experiment.

I came across an apple pie recipe that had a special crust. It wasn't just a plain ol' crust; it had the addition of lemon. This really stood out to me. I've seen a lot of recipes where blueberries and lemons go together so I thought this was perfect to use for both the fruit pies! The dough was really pretty with the specks of lemon zest and squares of butter mixed throughout. It was also easy to work with; not too sticky and once chilled, the dough becomes smooth and a breeze to roll out. I think I will be using this crust recipe a lot in the future.

photo

No pictures except the one from my iPod above. I wanted to focus on finishing the pies and I'm glad I did because it was 11 p.m. when we finally got to eat them. You will notice that the edges of the Blueberry Pie (on the right) are brown. I baked the crust alone (covered with foil and then filled with dry rice) but left it in the oven too long even after turning it off. Still good. The Apple Pie could have used more time in the oven, but thankfully, I sliced the apples thinly so the slight crunch added a nice texture to each bite. My first attempt at a lattice top didn't turn out too terribly either.

Before I got working on the fruit pies, the guys took care of Frito Pie. Basically, you spread some Fritos on the bottom of a casserole dish. Pour some chili over the Fritos or mix up raw ground beef, beans, and chili spices and spread it over the Fritos. Put another layer of Fritos on top and cover the top with lots of shredded cheese. Bake it at 375 for 20 or so minutes if using already cooked chili or about an hour if using raw beef. It was actually pretty good.

All in all, I think we had a great pie day that day.

Lemon Butter Crust

From
Family Style Food

2 cups all-purpose flour
2 tbsp sugar
1 tsp fine salt
2 tbsp grated fresh lemon zest
1 1/2 sticks butter (12 tbsp), cut into chunks
1/2 cup ice water plus more if needed
1 tbsp lemon juice

Stir together the flour, sugar, salt and zest. Cut the butter into the flour with a pastry blender or a fork until the butter is pieces about the size of large peas. Make a well in the center of the flour mix and add the water and lemon juice. Blend with a fork until the dough starts to come together. If there's flour on the bottom of the bowl, add more water a teaspoon at a time until you can gather the dough into a ball.

Divide into two pieces, wrap in plastic wrap and flatten slightly to form a disc. Chill in the refrigerator for about an hour and up to 24 hours.

When you're ready to assemble and bake the pie, heat the oven to 425F. Take the pie dough out of the refrigerator to soften slightly. If it takes more than 15 minutes to prepare pie filling, then put the dough back in the fridge until you're ready to fill the pie.

Smack one package of dough with a rolling pin to flatten. Unwrap and put the dough on a large floured piece of wax or parchment paper. Sprinkle the top of the dough with more flour and roll the dough firmly away from you, turning the paper after each roll to create a circle about 2 inches larger than your pie dish. Sprinkle lightly with more flour if you notice the dough starting to stick.

Fold the dough in half gently and place in a pie dish, pressing into the bottom of the dish. Be sure you have an overhang of about an inch all around. Trim off any excess. Pour in pie filling. Take the second piece of dough and repeat the rolling. Put the dough on top of the apples; pull the edge of the top dough over the bottom and pinch together all around the pie.

Use a sharp knife to make 4 vents in the center of the pie. (Or make a lattice top!) Put the pie in the oven and turn the oven down to 400F. Bake the pie about 30 minutes, until the crust is deep golden.

Thursday, March 15, 2012

Oreo Pie

Need more ideas for next year's Pi Day? Make Oreo Pie! I steered clear from any fruit pies because those definitely take way more time than I have right now on any given weekday. Maybe during the summer, but when you're short on time, this Oreo Pie is the best and quickest to make. The thing I loved most about this pie, though, was the fact that I didn't have to bake it. It was already growing warm in my apartment from the first pie I baked and the sun shining through my window, so I was glad I didn't need to leave the oven on. Plus, who doesn't love Oreos?

Oreo Pie

I think I've had enough with pies for now... Three in two days! But I don't make pies often, so this is a nice time to get all the pie-making out of my system :)

Oreo Pie
From The Repressed Pastry Chef

1 Oreo Pie Crust
12 Oreo cookies
8 oz cream cheese, softened
1/3 cup sugar
2 cups whipped cream [I used Cool Whip]

In a small bowl, smash up 12 of the Oreo cookies. Set aside.

In a medium bowl using a hand mixer, combine the cream cheese and sugar. Beat until light and fluffy. Add in the whipped cream and the smashed up Oreo cookies. Then use a rubber spatula and combine gently until well blended and the cookies are distributed throughout.

Spoon into the Oreo pie crust and refrigerate about 2 hours or until firm.

Wednesday, March 14, 2012

Fudge Brownie Pie

Happy Pi Day! As a math teacher, I felt the need to celebrate this with my students and what better way to do so than with pie. My Algebra 2 class sure enjoyed today as they got Fudge Brownie Pie and Papa John's pizza. (They are so spoiled.) I had even tried to get a fundraiser going where students can put money towards the teacher they want to see get pied, but it just didn't follow through, so I'm going to have to try to push for it next year!

Fudge Brownie Pie

Last year on Pi Day, I made Snickerdoodle Pie, which I am making for my first class tomorrow since I didn't see them today, and my fourth period is getting Oreo Pie (recipe for that later!). Both of those classes will actually be using the number pi, so I won't feel as bad as I do about today since I didn't plan anything pi-related besides pie-eating... They did have a test today, so I knew starting something new would be a bad idea.

Fudge Brownie Pie

Hope you enjoyed pie-eating or other pi-related activities today!

Fudge Brownie Pie
From My Fabulous Recipes

1 Pie Crust Dough (your favorite brand or made from scratch)
6 tbsp butter
2 oz unsweetened baking chocolate
1 cup sugar
2 tbsp all-purpose flour
2 tbsp milk
2 tbsp light corn syrup
1 tsp vanilla
1/4 tsp salt
3 eggs

Heat oven to 350F. Press pie crust dough against bottom and side of ungreased 9-inch pie plate building up 1/2-inch edges. Bake 10-12 minutes or until crust is light golden brown.

In saucepan, melt butter and chocolate over low heat, stirring occasionally. Remove from heat. Add remaining ingredients to saucepan until smooth and well blended. Pour mixture into baked crust.

Bake 20 minutes; place strips of foil over crust to prevent crust from becoming dark. Bake 20-25 more minutes or until top is crusty and filling is set (do not overbake). Cool on wire rack. When you take out the brownie pie, the middle part might have risen, but no worries because as it cools, it will set. Serve slightly warm with ice cream and drizzle chocolate syrup on top.

Store pie covered in refrigerator. If pie has cooled before serving, microwave individual pieces for about 15 seconds.

Thursday, November 24, 2011

Buttermilk Pie

Happy Thanksgiving! I hope everybody had a nice time with family. Since I wasn't with my family this year, my carpool buddy invited me to her family dinner. It was great meeting everyone and putting faces to their names and stories. I had wonderful food and made some wonderful new friends :)

Buttermilk Pie

I brought over a bottle of Bailey's to enjoy after dinner, but I couldn't show up empty-handed in terms of dessert. I knew that there was going to be Pumpkin Pie already, so I didn't even look at recipes for that. Plus, there were absolutely no more cans of pumpkin at Walmart. I then looked for not-so-heavy pies to lighten up our palettes after a heavy Thanksgiving dinner. Buttermilk Pie popped up and, funny enough, most people make it during the holidays as a Southern tradition, so I thought This is perfect.

Buttermilk Pie

Everybody enjoyed the pie so it was a success. There's minimum effort in putting this together: just mix everything, pour, and bake! I used Pillsbury's pie crust to make it even easier. I saw that just 20 minutes into baking, the top was getting brown a bit too fast, so I covered it with foil. But then, as I took off the foil towards the end, a piece of the top came off with it, so that explains the weird hole on top. The pie rises while baking, but gradually deflates as it cools down.

Buttermilk Pie

Buttermilk Pie

After dinner, I headed home before heading back out again to hit Walmart for some Black Friday deals. But, boy, once I got there, it was so crazy that I just looked at the DVD sections, grabbed a few movies, and got in line right away. While in line, I got lucky because somebody didn't want a 30-piece tupperware set so I grabbed that! I had planned on checking out Target and Best Buy for some more deals, but it wasn't even close to midnight by the time I got out of Walmart and as I drove by, the lines literally circled around the stores, so I knew I wouldn't find any parking. I'm happy with my purchases. Now I'll have new things to watch for the remainder of my break!

Buttermilk Pie [Makes 2 pies]
From Sing For Your Supper

2 9-inch pie crusts, unbaked
3 3/4 cups sugar
1/2 cup flour
1/2 tsp salt
1 tsp vanilla
6 eggs, beaten
1 cup (2 sticks) butter, melted
1 cup buttermilk
Lemon zest and juice (optional) [I left this out]

Mix sugar, flour and salt. Add eggs, butter, buttermilk and vanilla.

Pour into two unbaked pie crusts and bake for 1 hour at 350F. Check them at 50 minutes--if they’re too jiggly, put them back in for a few more minutes. They shouldn’t jiggle very much at all when they’re done. If the tops are getting too brown, cover loosely with foil for the remainder of baking time.

Let cool for at least 1 hour before slicing.

Thursday, June 2, 2011

Mini Apple Pies

No, I'm not back in New Jersey only to head back to Lexington after a week. I'm here to begin life after college, waiting to hear from jobs for the next year and interviewing at different places. While driving, I kept thinking of things I didn't do while I was a student or while I was in town. Like watching the sunset or the sunrise on top of one of our school buildings or visiting Foamhenge. Between those thoughts were also random memories. Happy memories where I can see my five housemates and I laughing our butts off about something that is probably not as funny anymore.

Mini Apple Pies Mini Apple Pies

I guess I should call them former housemates now. Strangely, I didn't feel sad leaving the two who are staying in Lexington in the summer. Maybe it's because I plan on visiting at least once. And I know that if I wanted to see any of them after the summer, all I have to do is drive 2, 3, or 6 hours and I'll be there (except I'd have to fly to see the friend in California, but still feasible). There are others, though, who will not be as easy to visit. But with Facebook or e-mail, it'll be easy to reconnect with them in an instant.

Mini Apple Pies Mini Apple Pies

A friend decided to cook dinner for us before we said our goodbyes so I made dessert before he took over the kitchen. I was leaving the next day so I didn't have anything in the house. Except... Wait, I never made that Caramel Apple Pie so there should be a pie crust in the freezer... And I still have a few apples left even after making the crepes a few days ago... Yes! Apple Pie! Those exact thoughts were running through my head as I was coming up with ideas.

I made them mini-sized to avoid leftovers. Plus, I didn't have a second crust for the top of a large pie, but enough for the tops of mini pies. Since I wanted to fit as much filling as I could into each pie, I cut the apples into 1/2-inch pieces. In that case, 25 minutes or even a bit less will be enough time for the apples to soften. Poke with a toothpick to check. As for the taste, it was pretty damn yummy. Make sure the syrup has enough cinnamon while cooking on the stove--you want to make sure you can smell it while it's baking. That's the best part. I used Pillsbury's pie crust so the only labor required in this recipe was peeling and slicing the apples. Everything else is easy to throw together.

Mini Apple Pies

Mini Apple Pies
Adapted from La Petite Frog

- 1 9-inch pie crust (such as Pillsbury's, found with the biscuits or homemade)

- 1/2 cup unsalted butter
- 3 tbsp all-purpose flour
- 1/4 cup water
- 1/2 tsp cinnamon
- 1/3 cup white sugar
- 1/3 cup brown sugar
- 4 Granny Smith apples, peeled, cored and sliced

1. Spray standard-sized muffin pans with cooking spray. Roll out the ready-made pie crust. Cut out circles about 5 inches in diameter. Press into muffin pan to form the bottom layer of pies. Then cut out 2- or 3-inch circles. You may need to knead the trimmings together and roll out again. Set aside.
2. Preheat oven to 425F. Melt butter in saucepan and stir in flour to form a paste. Add water, cinnamon, white sugar and brown sugar, and bring to a boil. Reduce temperature and let simmer.
3. Fill lined pastry pan with sliced apples. Pour sugar mixture over the top and cover with the saved dough circles, pressing sides with fork to seal. (I didn't have enough overhang from the bottom layer so I couldn't do that.)
4. Bake 15 minutes in oven preheated to 425F. Reduce temperature to 350F. Continue baking until apples are soft. Check after 25 minutes by poking with a toothpick.

Monday, March 14, 2011

Snickerdoodle Pie

Snickerdoodle Pie

Happy Pi Day! The constant, pi, has a value of 3.14159265 and so on; hence, the March 14th celebration every year. It's been a quite useful number in my math career and so I feel it necessary to celebrate this day. Sure, I could do some math problems, but the baker in me just really had to make a pie. And so I did! I baked it last night as I knew I would have no time to do it today and I had nothing in particular to do yesterday. But I plan on taking the pie to rehearsal tonight for more celebration.

Snickerdoodle Pie Snickerdoodle Pie

I knew it would be too much labor for me to make a cherry pie or an apple pie. Plus, none of those fruits are looking good at the market. So I came upon this Snickerdoodle Pie. First off, I love Snickerdoodles. (Actually, I love all baked goods.) The syrup that you pour over the pie smells amazing as you boil it. The mixture of sugar, butter, and cinnamon is heaven. As the pie cools, the surface hardens from the syrup but the inside still stays fluffy. Just like the cookie. I used Pillsbury's pre-made pie crusts and it tasted just fine. This is such an amazing concept for a pie. It's a cookie in pie form and I love it.

Snickerdoodle Pie

Snickerdoodle Pie
From Baking Bites

For the crust
- 1 9-inch pie crust (unbaked, rolled into a pie pan)
- 2 tsp butter, melted
- 1 tbsp sugar
- 2 tbsp ground cinnamon

For the filling
- 1/2 cup brown sugar
- 1/2 cup butter, room temperature and divided
- 3 tbsp water
- 2 tbsp corn syrup
- 1/4 tsp ground cinnamon
- 2 tsp vanilla extract, divided
- 1/2 cup sugar
- 1/4 cup confectioners’ sugar
- 1 tsp baking powder
- 1/4 tsp cream of tartar
- 1/2 tsp salt
- 1 large egg
- 1/2 cup milk [skim works fine]
- 1 1/4 cups all purpose flour

1. Preheat oven to 350F. Prepare the pie crust by brushing the inside of the crust with melted butter.
2. In a small bowl, combine sugar and cinnamon. Pour into pie plate and turn to coat the entire inside of the crust with the cinnamon sugar mixture. Set aside.
3. In a small saucepan, combine brown sugar, 1/4 cup butter, water, corn syrup and cinnamon. Bring mixture to a boil, stirring occasionally to dissolve the sugar. Once sugar has dissolved, boil the syrup for 2 minutes. Stir in 1 tsp vanilla extract. Set aside.
4. In a large mixing bowl, cream together remaining 1/4 cup butter, sugar and powdered sugar until light and fluffy. Blend in baking powder, cream of tartar and salt. Beat in egg and remaining 1 tsp vanilla extract, followed by the milk. When mixture is smooth, blend in the flour, mixing only until no streaks of flour remain visible.
5. Pour flour mixture into prepared pie crust. Pour syrup over the cookie mixture. Do not mix. Carefully transfer pie to the oven. Bake for about 45 minutes, until pie is browned and a toothpick inserted into the center comes out clean. Cool for at least 30 minutes before serving. Serve warm.

Snickerdoodle Pie

Sunday, January 2, 2011

Apple Pie

I'm sure you've noticed by now that this blog has a new layout. I finally got the motivation to draw something of my own to put on here. I was never good at drawing faces, so after a bit of googling and lots of drafts, I ended up with the two at the top of this page. It's not much, but I think it adds a personal touch to the layout.

This is part of my "resolutions" for the New Year. I didn't see the New Year as such a big deal because I guess I'm in denial. I don't usually make resolutions because I'm definitely not the type of person to keep any of them. But there are some areas of my life that I want to focus on.

Of course, there's my student-teaching coming up. I want to come out of that experience knowing if I want teaching to be my future or not. I keep having second thoughts, so I'm sure spending a whole term in the classroom will let me know. Secondly, I have just 6 months left in Lexington and I want to explore the place as much as possible. Do as much as I can in this town before I have to leave. Even if I visit sometime in the future, it will not be the same as being a resident of the town. Third, I want to cook and bake more. I want to become a better blogger and a better food photographer. This seems like a big goal for me, but I just want to make some progress. No matter how busy I get, I always tried to make time for the kitchen and I want to keep that up. And lastly, I want to be a better sister and a better daughter. I've felt that my parents and I have become a bit distant because our interests are obviously so different, but they're even more different than before. I don't call my parents as often as I should and we know we're all busy sometimes, but I need to make time to let them know what's going on in my life.

Enough blabbing. Last week, my sister requested I make Apple Pie. She gave me a recipe and I got to work right away. For some reason, I find making apple pie relaxing. Not that I feel pressured when I'm making other foods, but it was such a calming experience. Maybe this will inspire me to make more pies and I'll be on my way to meet at least one of my resolutions!

For the crust, I used a recipe from Donna Hay. While it is a great-tasting crust, it didn't work as an apple pie crust for us, so I'm still on a search for the perfect pie crust. I do have to say, though, the crust tasted better a few days later. I also, for some strange reason, thought the apples in Apple Pie had to be wedges and not slices. My sister liked this filling recipe because the filling isn't syrupy. The original recipe calls for 6 apples, but I used only 5, but I might consider using even less next time. Maybe 4, or 4 1/2. And a mix of Fuji and Granny Smith.

Apple Pie Filling

Apple Pie

Sunday's Apple Pie
From Allrecipes

- 2 prepared pie crusts (recipe below)
- 6 tart (Granny Smith) apples, peeled, cored and sliced
- 1/2 cup white sugar
- 2 tsp ground cinnamon
- 2 tbsp all-purpose flour
- 3 tbsp butter

1. Preheat oven to 350F (175C).
2. Place sliced apples in a large bowl. In a small bowl combine sugar, cinnamon, and flour. Stir well and pour mixture over apples. Cut half of butter or margarine into small pieces and add to apples. Toss apples until thoroughly coated.
3. Pour apples into pastry-lined pie pan. Dot apples with the rest of butter or margarine. Place second pastry on top. Seal edges and cut steam vents in top crust.
4. Bake in preheated oven for 45 to 55 minutes, until crust is golden brown.

Slice of Apple Pie

Sweet Shortcut Pastry [Makes 1 crust - double for a top crust also]
From Modern Classics Book 2 by Donna Hay

- 2 cups flour
- 3 tbsp sugar
- 5 oz cold butter, chopped
- 2 to 3 tbsp ice water

1. Process the flour, sugar and butter in a food processor until the mixture resembles fine breadcrumbs. While the motor is running, add enough iced water to form a smooth dough and process until just combined. Knead the dough lightly, wrap in plastic wrap and refrigerate for 30 minutes.
2. Roll out the pastry on a lightly floured surface or between sheets of non-stick bakin paper until 1/8 inches thick, or whatever thickness required, and line the tart tin or pie dish.
3. Preheat the oven to 350F. Place a piece of non-stick baking paper over the pastry and fill with baking weights or uncooked rice or beans. Bake for 10 minutes, remove the weights and bake for 10 more minutes or until the pastry is golden.

Wednesday, December 29, 2010

Pumpkin Pie

Pie Crust

Can I just say, I have always wanted a picture like this? My hands working on something and in this sort of warm lighting. I thank my sister for taking it for me as I worked on the pie crust.

When I was deciding on the dessert for Thanksgiving dinner, I chose to make something healthy as I thought my parents didn't need more unhealthy food than the rest of the dinner already included. It was sweet potato versus pumpkin for dessert flavors and since I found a recipe for Sweet Potato Biscuits, I settled on Pumpkin Pie. I've never actually had pumpkin pie before so I don't know what it's really supposed to taste like, but I didn't think this was too bad. I would keep the filling as it is. It has a clean pumpkin flavor with a light texture. But I would go for a different crust. It's quite weird to work with and while it is flaky, the taste that crusts should have was not there. If you do decide to use this crust, pre-bake it. The directions did not say so and so I didn't, but it'd be better if you did.

Pie Crust   Healthified Pumpkin Pie

Healthified Pumpkin Pie
From Eat Better America

- 1 1/4 cups all-purpose flour
- 1 tsp sugar
- 1/4 tsp salt
- 1/4 cup vegetable oil
- 3 to 4 tbsp skim milk

- 3 egg whites or 1/2 cup fat-free egg product
- 1/2 cup sugar
- 1 1/2 tsp pumpkin pie spice*
- 1/8 tsp salt
- 15 oz pumpkin (not pumpkin pie mix)
- 12 oz evaporated fat-free milk
- 1/2 tsp vanilla

1. Heat oven to 425F. In medium bowl, mix flour, 1 teaspoon sugar, 1/4 teaspoon salt and the oil with fork until well mixed. Stir in milk, 1 tablespoon at a time, tossing with fork until all flour is moistened and pastry almost leaves side of bowl. Shape pastry into a ball, using your hands. Press pastry in bottom and up side of 9-inch glass pie plate; flute as desired or press pastry to top edge of pie plate with fingers or fork.
2. In medium bowl, beat egg whites slightly with wire whisk or egg beater. Beat in 1/2 cup sugar, pumpkin pie spice, 1/8 tsp salt, pumpkin, evaporated fat-free milk, and vanilla. Pour filling into pastry-lined pie plate; carefully place on oven rack. Bake 15 minutes.
3. Reduce oven temperature to 350F. Cover edge of pie crust with 2- to 3-inch strip of foil to prevent excessive browning. Bake about 45 minutes longer or until knife inserted in center comes out clean.
4. Cool on cooling rack at least 1 hour before serving. After cooling, pie can remain at room temperature up to an additional 5 hours, then should be covered and refrigerated.

*If you don't have pumpkin pie spice, you probably already have most of the spices in your pantry, so just mix together the following: 4 tbsp ground cinnamon, 4 tsp ground nutmeg, 4 tsp ground ginger, 3 tsp ground allspice. Yields 8 tbsp.

Healthified Pumpkin Pie

This is also proof that our oven is crooked because one side had more filling than the other. I also didn't put foil around the edges so the filling caramelized.