Feeling no guilt is probably what made last weekend one of the best weekends. Usually, when I visit my friends out of town, I take with me a textbook and papers to grade. And usually, I don't do as much work as I would have liked to, so I feel guilty and anxious about the next school day. But because the students had no school all week, I didn't have a lesson plan to worry about last Sunday. I still had to go into school on Monday and Tuesday for parent-teacher conferences and professional development, but no students.
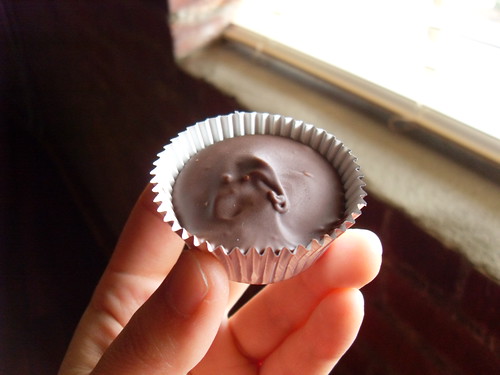
While visiting my friend, I got some retail therapy in, ate wonderful cafe food and bad-for-you-but-so-good Chinese food, went out to bars and got creeped on by creepers, and saw one of our rescue cats all grown up :) As a thank you to my friend for letting me to stay at her house for a whole weekend and for what I knew was going to be a fun time, I showed up with homemade versions of her favorite candy.

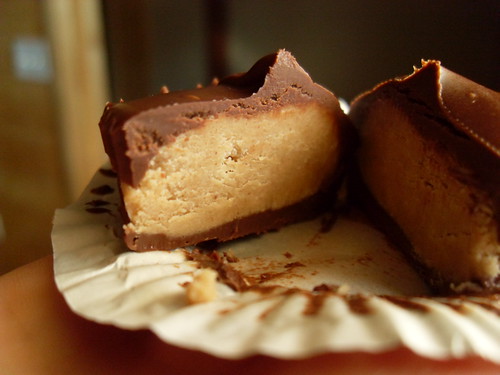
The filling is delicious and milk chocolate chips are the way to go with these. I never really liked Dark Reese's anyway. My only issue was that there was too much chocolate. I want to try using a brush to "paint" the paper cups next time to get a thinner layer. There are so many other recipes that I'd love to try, but this one's a winner so far. Oh, and do not skip on the shortening. It really does make a difference in the consistency of the chocolate.
Homemade Peanut Butter Cups [Makes 3 dozen]
From Brown Eyed Baker
1 cup creamy peanut butter
1/4 cup unsalted butter
1/4 cup light brown sugar
1 1/4 cups powdered sugar
4 cups milk chocolate chips
1/4 cup vegetable shortening
Line a mini-muffin tin with paper liners. Set aside. Line a baking with parchment paper. Set aside.
In a medium saucepan, combine the peanut butter, butter and brown sugar over medium heat. Heat until completely melted and starting to bubble a little, stirring constantly. Remove from the heat. Add the powdered sugar 1/4 cup at a time, stirring until completely combined with the peanut butter mixture after each addition. Set aside and let cool.
Meanwhile, melt the chocolate chips and shortening together in the microwave on 50% power in 30-second increments, until completely melted, stirring after each burst.
Using a small cookie scoop or a couple of teaspoons, spoon melted chocolate into the bottom of each lined muffin cup.
Use a heaping teaspoon to scoop out the peanut butter mixture. Roll it into a ball, and then flatten it slightly into a disk. Place on the prepared baking sheet lined with parchment paper. Once finished with all of the peanut butter mixture, refrigerate both the muffin tins and the peanut butter patties for about 30 minutes.
Place a peanut butter patty on top of each chocolate-lined muffin tin. Then use a scoop or spoon to add more melted chocolate on top and around each peanut butter patty. (If the melted chocolate firmed up, just pop it back into the microwave at 50% power for 30 seconds or so to re-melt.)
Refrigerate again for 30 minutes, then they’re ready to serve! Store in the refrigerator or freezer. You can keep at room temperature in an airtight container if you’re going to serve them the same day, but they’ll start to get soft if not at cool room temperature.
1 comment:
These homemade peanut butter cups sound delicious and satisfying.
Post a Comment